This is a great idea for Christmas Secret Santa gift or give away when you have guests come visit during the Christmas Season. It makes a perfect Christmas gift from your child to their teacher too!
All you need is.....
Large Lollipop 4" x 4" (I find these at Dollar Tree)
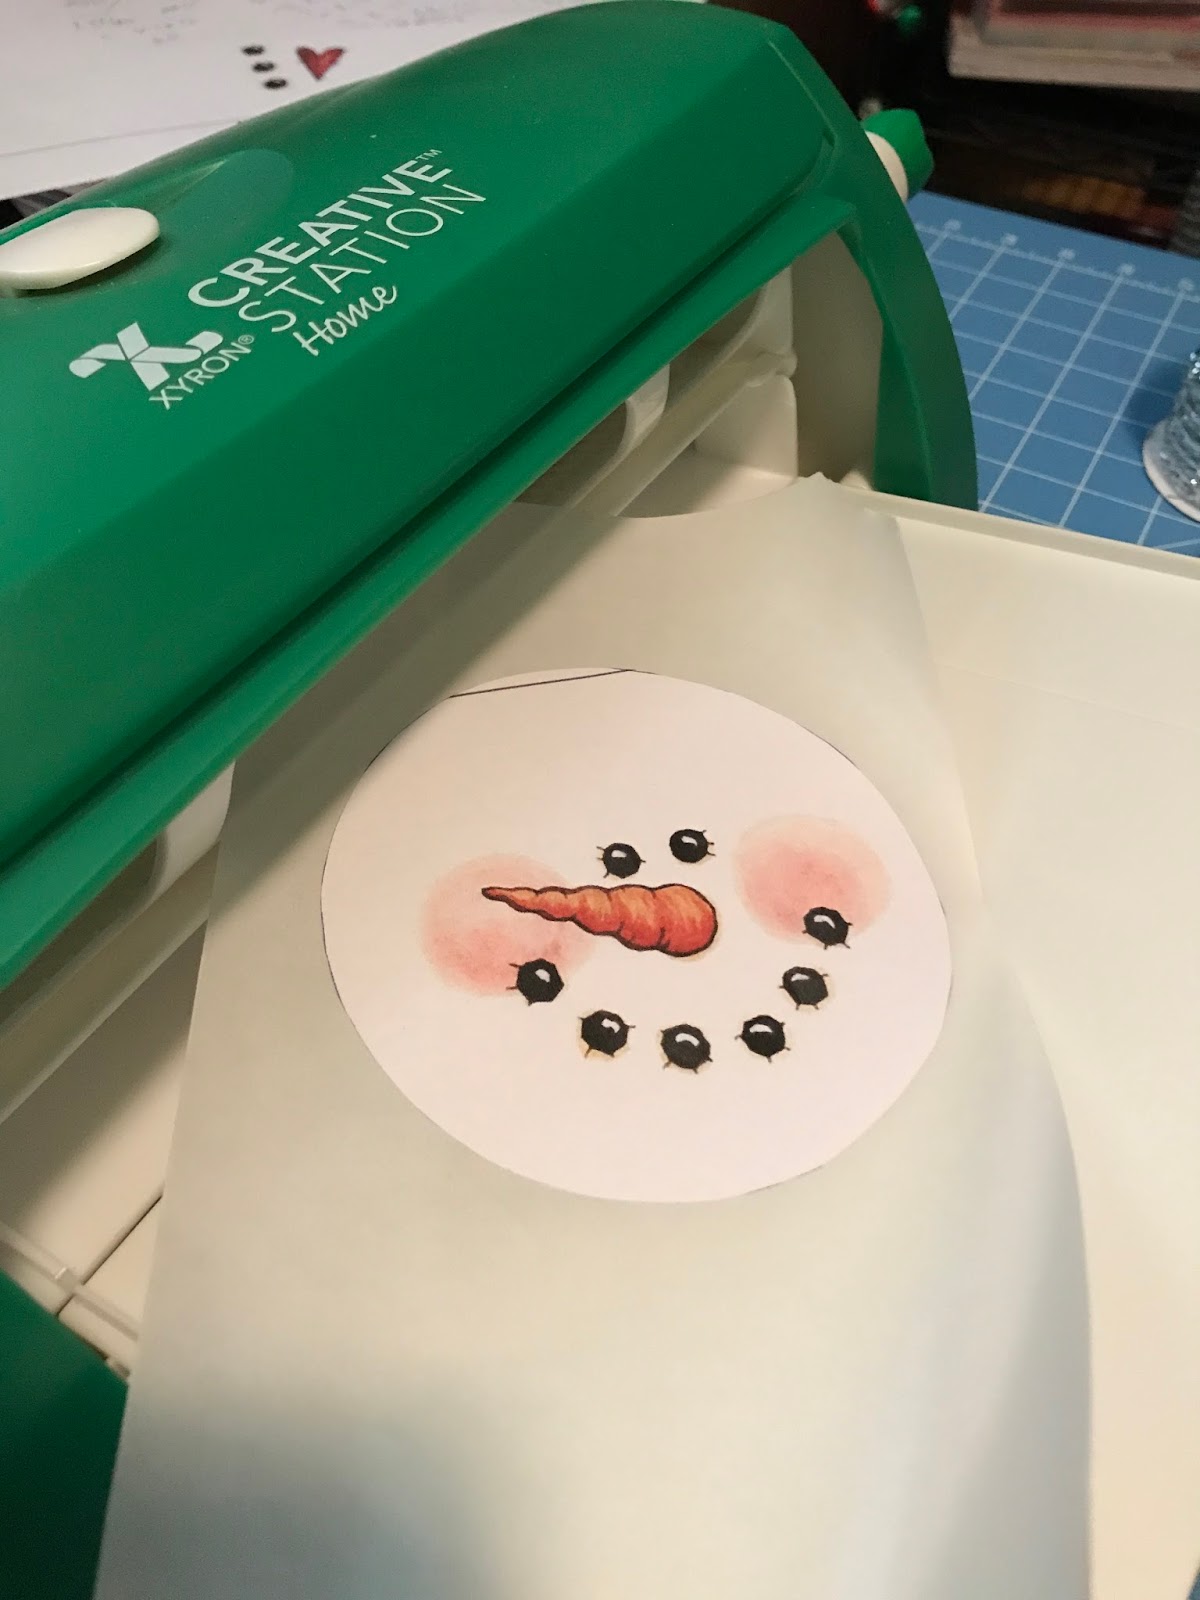
Snowman face (you can draw it or get free clip art from the internet)
White copy paper
Adhesive to attach snowman paper face to lollipop
Fleece, Flannel or Felt for cap and scarf
Jingle bells
Christmas ribbon
Christmas embellishments
Embroidery floss small amount (color to match cap/scarf)
Hot glue/glue gun
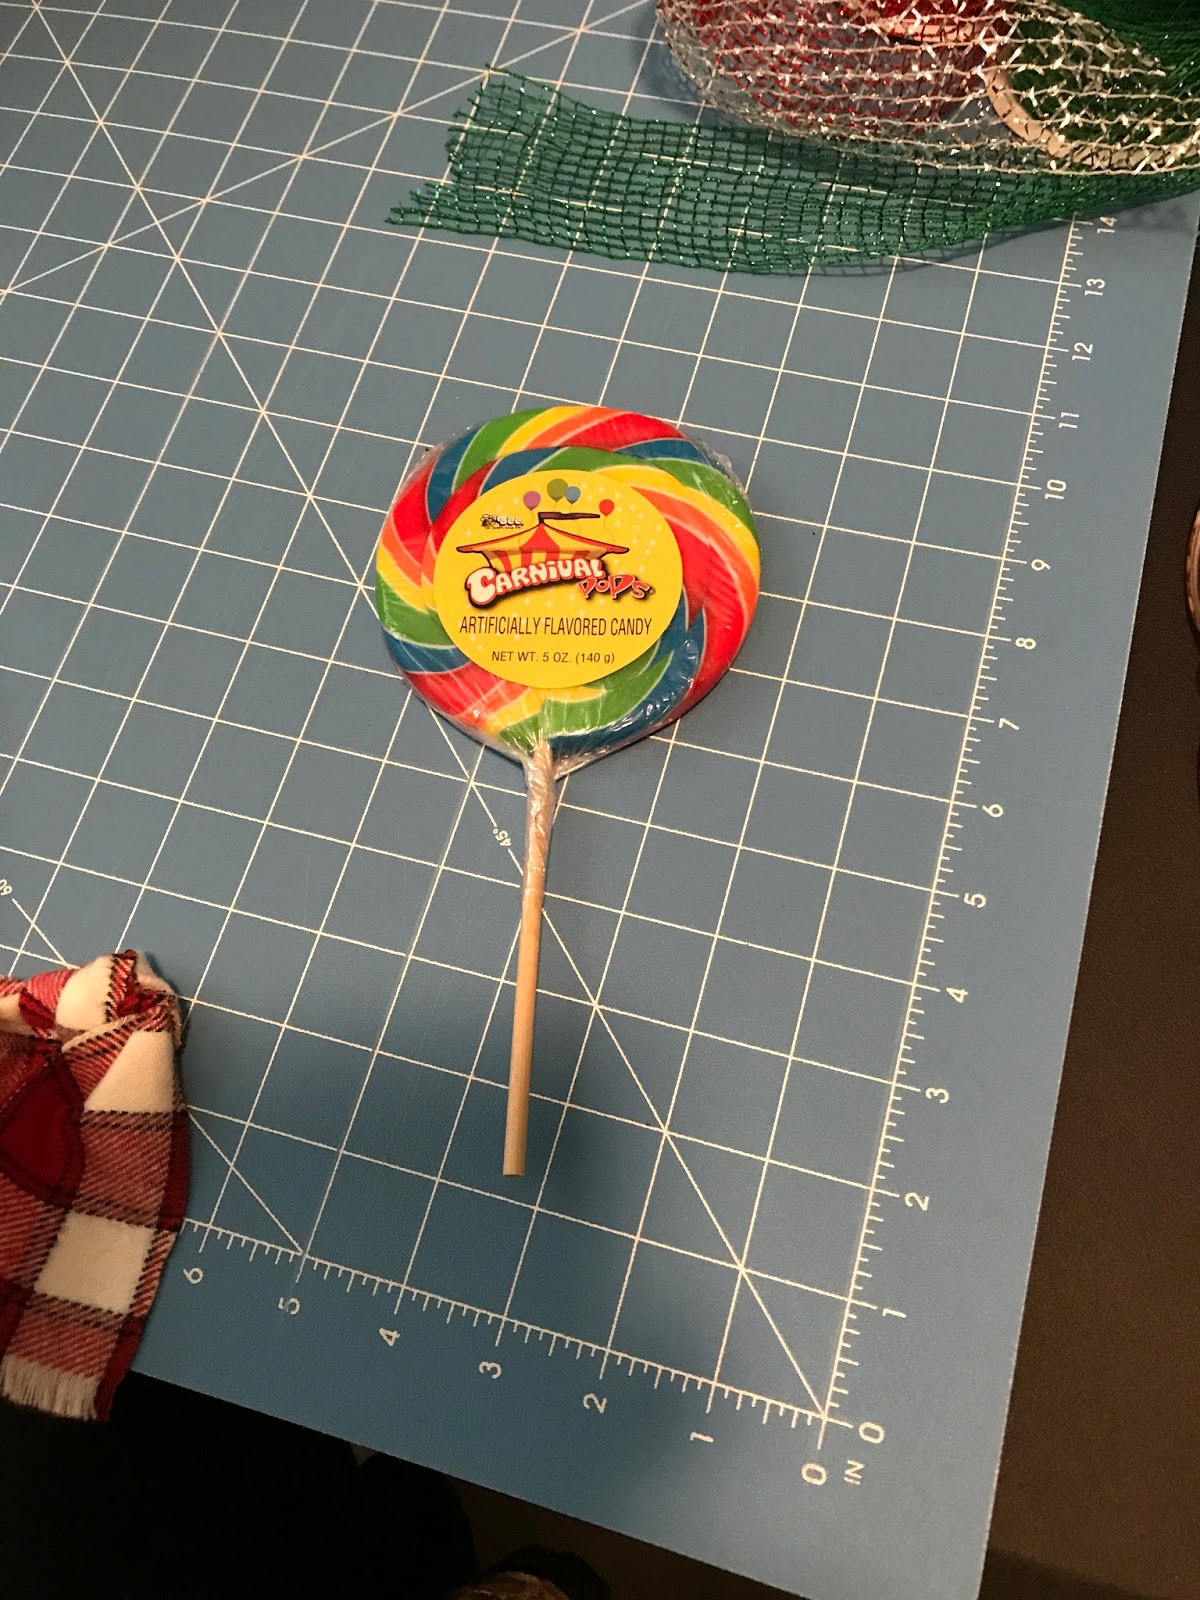
The large lollipops are a dollar each at the Dollar Tree. Do not remove the plastic wrapper from the lollipop. Do not remove the front or back label, as the front one will be totally covered with the snowman face. The ingredient label on the back, should remain intact.
Search the internet for Free Snowman candy wrapper templates, save to your computer, size them and print them. Or you can just paint the face yourself. Cut it out and make sure its just a little bit smaller than the lollipop. Use double sided adhesive tape or run it through a sticker maker, then adhere to the front side of the lollipop, leaving the ingredient list intact on the backside.
Hat......
I used a piece of plaid flannel cut to 10 inches lengthwise by 7 inches wide. Please refer to the photo to see placement. Fold about 1 inch up twice lengthwise to create the cap band. Positioned it on the lollipop, just over the eyes, flip it over, overlap the sides on the back and glue it together. Tack the cap onto the lollipop every inch or so with the hot glue to keep it from sliding off. Gather the top of the cap, use the embroidery floss to tie it up, leaving an inch or so of the fabric at the top, fluff it up, tie some ribbon and 2 jingle bells to it.
Scarf....
Cut a strip of 1 and 1/2 inches wide by 10 inches long of the fabric for the scarf, tie it around the stick just below the lollipop, position like a winter scarf and hot glue it.
Add snowflakes or embellishments of your choice to add your finishing touches.
And there you have it!!!
If you look a little further down in my blog, you will see some I made with a Halloween theme last year. They are pretty cool too!
Hope you have as much fun as I did making these! Make them for your friends and family. They will love them!
Tuesday, October 24, 2017
Monday, October 23, 2017
THANKSGIVING WREATH 2017
TIP....I found it very helpful to use my artist easel to hang it on while I worked on the wreath.
Labels:
Fall wreaths,
Mesh wreaths,
Thanksgiving wreath,
wreaths
Wednesday, April 19, 2017
Saturday, October 17, 2015
Halloween and Dia de los Muertos Lollipops
![]() |
| These are pretty large. 4" x 4" around. |
I know my friends and family will just love them!!!
![]() |
| These are smaller, 2 1/2" x 2 1/2" around. |
Sunday, August 30, 2015
YAY, HAIR BOWS!
Hi guys!! I'm excited about some hair bows I've been creating!! Everyday bows and lots of Halloween ones too!! Hopefully they will sell at a craft sale I'll be at next month!! I have been learning from some awesome tutorials on Youtube. If you'd like to learn how or to brush up on your bow making skills, just go to Youtube and click in "how to make a hair bow" and hundreds of tutorials come up!! Love Youtube!!
Here are some of my bows......
![]() |
| Colorful |
![]() |
| Sweet |
![]() |
| Spooky! |
![]() |
| More spooky! |
![]() |
| These are pin back buttons, I did the graphics on my computer then made the pins and added ribbon bows and trinkets. |
![]() |
| Even more spooky! |
![]() |
| Football Spirit and others |
Labels:
everyday hair bows,
hair bows,
Halloween hair bows,
Ribbon,
ribbon bows
Sunday, June 14, 2015
WORTH REPEATING.....4TH OF JULY DOOR WREATH.
Here's a really nice festive wreath you can make for the 4th of July!
It's a straw wreath that's covered in red, white and blue bows, just make a bunch of florist bows, using water proof ribbons, which are available at floral supply places, attach them to the wreath with wire or floral picks, position the colored bows to resemble the American flag. You can add a small flag, glittered stars and sprigs of metallic embellishments. It's very easy to make and it looks great on the front door!
Hope you all have a very happy 4th of July!!! Stay safe!!
Labels:
4th of July,
american flag,
red,
white and blue wreaths
Monday, April 20, 2015
My Book...Sarah and the Little Spider Prince
![]() |
| Sarah and the Little Spider Prince |
It was like a dream!!! Thanks to God, it is actually a dream come true!!!
It's called "Sarah and the Little Spider Prince" The illustrator who did the art is so, so very talented and did an absolutely, wonderful outstanding job!!! Go see it at Amazon.com!!!
Tuesday, April 14, 2015
Recycle Your Old Blue Jeans
| I created this one by using a recycled blue jean mini skirt. |
| This one is Teal ribbon and ruffle with white stars. I think I'm going to add some sparkle to it. |
Labels:
Fabric glue,
Hot glue gun,
Old blue jeans,
Recycle blue jeans,
Ribbon,
Ruffle
Monday, March 16, 2015
St. Patrick's Day Charming Necklace
I decided to create a (green) necklace to wear on St. Patrick's Day to keep from getting pinched. So I hunted through my collection of vintage jewelry and found this pendant that was missing the jewel. It's two inches tall by one and a half inches wide. Perfect. I used Glossy Accents to adhere fine green glitter along the inside edge of the pendant, then fine white glitter in the center. Meanwhile that dried, I made a very tiny label on my PC and used clear tape to attach it to a very tiny glass vial. Which I then filled with fine green glitter (Lucky Dust) and sealed with a cork. Then I applied a couple of drops of gel superglue onto the back of the vial and set it onto the center of the pendant. I love using the gel (as opposed to liquid) superglue because it doesn't run and it sets instantly. After that was all done, I went back into the vintage jewelry, pulled out a couple of green beaded necklaces, took them apart and created one that matches perfectly! So, there it is. A very charming necklace, perfect to wear on St. Patrick's Day!!
After St. Patrick's Day, I think I will remove that label and replace it with one for Halloween, one that will say something like....."Eye of Newt Powder" or "Magic Spell dust" or something a little more spooky!
Yay! I love it!!!
Friday, February 20, 2015
CROCHETED FLOWER HEADBANDS
I decided to make some cute crocheted headbands with a crocheted flower on it because my little niece has been asking me to make one for her. I did not have a pattern but I crocheted a regular headband and went online for a flower pattern, there are sooo many tutorials about that on youtube and so I took the basics and added my own idea to complete it. I am happy with the final results. I'll be making more of these in different colors for my niece and maybe add some sparkling rhinestones or other embellishments to the flowers.
If you would like some instructions on crocheting these, search for them on youtube and watch the tutorials. They are super informative!!
Labels:
Crochet,
Crochet flower headbands,
Crochet headbands
Tuesday, January 27, 2015
NAUTICAL PARTY DECORATIONS
![]() |
| Tabletop centerpieces. These were a work in progress when this picture was taken. |
![]() | |||||
| The photo prop. The sand filled buckets were topped with seashells later. |
The photo prop was a little harder to create. A ready made Styrofoam blank frame at a floral supply place was expensive, so we opted to purchase an 8ft x 4ft Styrofoam Panel at Home Depot for $13.00. My sweet hubby cut it down to 4 feet wide and 3 feet high then cut out a square opening in the center leaving an 8 inch border all around. We glittered the frame and attached all the cutouts, we had previously glittered the letters for the wording. I used LOW temp hot glue because the hot temp hot glue will melt the Styrofoam.
The party was awesome and lots of guests took pictures of themselves in the photo frame!
Monday, November 3, 2014
Tooth Fairy wall hanging
![]() |
| Tooth Fairy themed Altered Trap |
I added a small drawstring pouch for holding the lost tooth and a small bottle of Fairy Dust to sprinkle just a little into the pouch along with the tooth. The spring action arm can be lifted and the Tooth Fairy can slip in a dollar or two or five where it will be held securely.
One tip I will mention is to use small eyehooks or eye bolts, an eye bolt is a metal bolt with a loop at one end that are screwed into the wood. They are used to firmly attach a securing eye to the bottom so that dangling things may then be tied to it, or to the top to attach a beaded hanger such as the one I attached to mine.
My theme for the one I created was "Tooth Fairy". I had to bring it home from the class incomplete because I accidentally left some items that I needed to add to it at home!! Oy!!!
Some of the others made some really gorgeous ones! Their themes were Vintage Jewelry, Christmas, Hearts and Steampunk! Very Cool!!!
Friday, October 10, 2014
HAPPY HARVEST SCARECROW
| My Happy Harvest Scarecrow for this year! |
Labels:
FALL DECO,
HARVEST SCARECROW,
PUMPKINS,
SCARECROW
Wednesday, October 1, 2014
PERSONALIZED PARTY LOOT BAGS
| Personalized Festive Party Loot Bags! |
These canvas bags were fun to design and paint. My niece ordered these online, but I believe Hobby Lobby carries similar canvas bags.
I used dimensional glitter fabric paints from Tulip, and just free handed the graphics. I cut to size a thin square of cardboard and slid it inside each bag before painting to provide a rigid and stable surface behind the canvas to paint on, the cardboard also protected the back side of the bag from any paint that might have seeped through the front side. I allowed plenty of time for them to dry thoroughly.
They are nice and roomy and hold a lot of candy and party favors making them really ideal for personalized Party Loot Bags!
Monday, September 29, 2014
FIRETRUCK THEMED PARTY CENTERPIECE
Hi, today I'm posting about party centerpieces that I made for my godson, Jesus, that turned 3 years old recently. The party theme was Firetrucks. He LOVES Firetrucks! So, how to create centerpieces around a firetruck theme....this is what I came up with, and made 14 centerpieces, this is how I made them....I used the following;
14 squares of Styrofoam (cut to desired size) these were 2 inches thick and 6 inches square
14 squares of pine lumber (cut to desired size) these were 2 inches thick and 6 inches square (optional)*
14 Number "3" Styrofoam shapes
1 roll yellow duct tape
1 roll red duct tape
2 packages of yellow tissue paper
2 packages of red tissue paper
1 package of red Holographic cellophane
14 large individually packaged lollipops
1 package red fine glitter
white glue
1 package U Floral pins (i found these at Hobby Lobby)
28 large Popsicle sticks
1 package wood skewers
Hot glue gun and glue sticks
Themed graphics and text (I used my computer for this)
My hubby had some white pine lumber in his workshop and I had him cut 14 six by six inch squares, he did the same with the Styrofoam.
I hot glued the Styrofoam squares onto the wood squares, then took the duct taped and wrapped the yellow duct tape around each of the wood squares and then the red duct tape around the Styrofoam squares, I had to over lap a bit of the red tape over the yellow tape. *The wood base is mainly for weight, the party was outdoors and the centerpieces will stay in place on the tables even on a windy day, for indoor parties you do not have to add the wood base.
I cut the yellow and red tissue paper into 4x4 inch squares, about 24 yellow, about 15 red and 4 Holographic red for each centerpiece. I pinched and gathered each tissue square in the center of the square and using the U floral pins I pinned two tissue squares at a time into the top inside edge of the Styrofoam all around, then did the same with the red tissue within the yellow square until it was nice and full. I added a Holographic square the same way in the center of each centerpiece side and one in the top center.
I inserted wood skewers into and painted the "3"'s and waited for them to dry, then I brushed white glue on both sides and dipped them in the red glitter to coat.
I made the graphics on my computer and printed them on white card stock, cut them out and used just a bit of glue to secure them back to back, since they were going to be seen from both sides, then laminated them. I made a small opening at the bottom of each one and inserted a large Popsicle stick and inserted the other end of the Popsicle stick into the Styrofoam with a bit of hot glue to secure, first making sure where exactly I wanted to place them, did the same with the "3"'s. Then I inserted the large lollipop behind the number 3, but those were not glued down.
These were so cute and you can use whatever colors you'd like and decorate for any themed party!
I hope I covered everything, if you have any questions, please leave me a comment.
14 squares of Styrofoam (cut to desired size) these were 2 inches thick and 6 inches square
14 squares of pine lumber (cut to desired size) these were 2 inches thick and 6 inches square (optional)*
14 Number "3" Styrofoam shapes
1 roll yellow duct tape
1 roll red duct tape
2 packages of yellow tissue paper
2 packages of red tissue paper
1 package of red Holographic cellophane
14 large individually packaged lollipops
1 package red fine glitter
white glue
1 package U Floral pins (i found these at Hobby Lobby)
28 large Popsicle sticks
1 package wood skewers
Hot glue gun and glue sticks
Themed graphics and text (I used my computer for this)
My hubby had some white pine lumber in his workshop and I had him cut 14 six by six inch squares, he did the same with the Styrofoam.
I hot glued the Styrofoam squares onto the wood squares, then took the duct taped and wrapped the yellow duct tape around each of the wood squares and then the red duct tape around the Styrofoam squares, I had to over lap a bit of the red tape over the yellow tape. *The wood base is mainly for weight, the party was outdoors and the centerpieces will stay in place on the tables even on a windy day, for indoor parties you do not have to add the wood base.
I cut the yellow and red tissue paper into 4x4 inch squares, about 24 yellow, about 15 red and 4 Holographic red for each centerpiece. I pinched and gathered each tissue square in the center of the square and using the U floral pins I pinned two tissue squares at a time into the top inside edge of the Styrofoam all around, then did the same with the red tissue within the yellow square until it was nice and full. I added a Holographic square the same way in the center of each centerpiece side and one in the top center.
I inserted wood skewers into and painted the "3"'s and waited for them to dry, then I brushed white glue on both sides and dipped them in the red glitter to coat.
I made the graphics on my computer and printed them on white card stock, cut them out and used just a bit of glue to secure them back to back, since they were going to be seen from both sides, then laminated them. I made a small opening at the bottom of each one and inserted a large Popsicle stick and inserted the other end of the Popsicle stick into the Styrofoam with a bit of hot glue to secure, first making sure where exactly I wanted to place them, did the same with the "3"'s. Then I inserted the large lollipop behind the number 3, but those were not glued down.
These were so cute and you can use whatever colors you'd like and decorate for any themed party!
I hope I covered everything, if you have any questions, please leave me a comment.
Wednesday, September 3, 2014
MORE RESIN PENDANTS
![]() |
| These pendants are 1 1/4" x 1 1/4" square |
![]() | |
| The Owl paperweight is 4" x 2" and the coaster is 4 inches big |
In the pictures you can see the cute pendants, an Owl paperweight I also made (love it) and my first drink coaster, I used puffy vinyl stickers on both and glitter (of course). The little characters in the pendants are buttons with the shanks removed.
The coaster cured very well and is very hard, I guess the humidity wasn't so bad that day.
If you have any questions, please feel free to use the comments section, and I will try my best to give you an answer.
Tuesday, July 29, 2014
CLEAR CASTING EPOXY PENDANTS
| So much fun to create with EasyCast!! |
I used EasyCast Clear Casting Epoxy, Perfect Pearls pigment powders to add color, some plastic (three dimensional) cupcake, ladybug and heart buttons for the heart pendants, some puffy plastic sticker for the round ones, and lots of iridescent fine glitter.
Here is the link for the video tutorials I'm learning from, I think you'll enjoy them!
craftklatchwithmona.blogspot.com/
Friday, February 14, 2014
HYDRANGEAS
![]() |
| Hydrangeas |
Saturday, January 4, 2014
PAINT CHIP ART
2 ft. by 3 ft. canvas
I need some inspiration!!!!
Wednesday, April 24, 2013
More cards.....
Been creating some cards for the last couple of days, in between other projects I have going, here are 4 of them. The bonnet girl I cut out free hand and just glued her together, it's for my aunt who lives in Georgia.
I love to use scrapbook paper and just layer.
Thursday, April 11, 2013
Trash to Treasure.......
![]() |
| Trash to Treasure........... one empty cardboard beverage container and some imagination......to create a whimsical tools holder! |
So, first, I spray painted it a couple of times, spray covers faster and dries faster than brushing the paint on.
Too give it extra stability, I took 6 empty plastic soda bottles, cut them down to size and slid one into each slot (refer to picture). They fit perfectly snug.
![]() |
| Need 5 more empty plastic soda bottles. |
![]() |
| Finished project!! Now to fill it up! |
Hopefully you can make one too!! I LOVE to recycle!!!
Friday, March 1, 2013
Silk Flower Art in Rustic Frames
I had these two wooden, 8"x8", rather rustic looking frames that were just laying around with nothing to do, they were too pretty to just throw into a storage box, so I thought and thought on what I could use them for. So, I pulled out two colorful silk flowers from my collection, cut them apart and hot glued them back together into the 4x4 inch opening with some large leaves and there you go! Flower art!
Labels:
rustic frames,
silk flower art,
Silk flowers
Monday, February 11, 2013
VALENTINE CARD
Making Valentine cards today. I love using Recollections packaged blank cards with envelopes, they come in many wonderful colors!!
Those heart shaped paper doilies are so perfect for Valentine projects, the only problem is gluing them down with the bulk and mess of liquid glue, so, instead I ran it through the Xyron machine, to make it like a sticker, just peel and stick. Love it, but my Xyron is sooooo old! I need a new one.
I also made a rose with ribbon and glued a sparklie in the center, and also added some Diamond mesh wrap roll sparkle rhinestone ribbon on the bottom and on the upper right hand side of the card. You can find this awesome ribbon at floral supply places, or, you can Google it and find it online. It is very versatile, flexible and can be cut into any shape. I highly recommend this product, I just love it!!
Sunday, January 27, 2013
Art using paint chips
Anytime we make a trip to Home Depot or Lowes, I make a bee line to the paint department. I LOVE to look at all the different color paint chips they have on display......for the taking.......free!! I pick and choose lots of those paint chips every time and bring them home with me, they can be used in many art projects......but they just sit there...... in a box......... with all the others I collected before. So I decided to make art with them! I had two 8x10 canvases and sprayed painted both black, then used my fingers to paint one foreground in teal and the other in a nice rich green. I then painted a black heart in the center and took the teal paint chips and cut them up in different sizes and glued them in the heart in a mosaic style and did the same for the second one with green paint chips. After all was dry, I wrote out "Faith" on the green and "Hope" on the teal. I am very happy with the end results, two more canvases are waiting to be made up the same way, with other inspiring words. Can't hardly wait to work on them!! I'll post those pics when they are finished.
Thursday, December 27, 2012
RED ROSES FOR A DECEMBER WEDDING 12/22/2012
I made many, many fresh floral arrangements using just red roses, for a December wedding last week. Tall and short arrangements for the tables at the reception. I was helping a friend who booked the wedding. All in all we used well over 1000 fresh red roses! The red roses are pretty hardy and are easy to work with, it's just labor intensive to make so many arrangements. Here are a few pics...
Work in progress.....
More work in progress....
These were on the Bride and Grooms table, she wanted the red roses with some red carnations mixed in, three graduating sizes on mirrors. So very pretty.
Work in progress.....
More work in progress....
At the reception hall
(the lighting was minimal)
Monday, October 22, 2012
Handmade dish towel apron
I had been looking for an apron with a dish towel attached but had no luck finding one, so I decided to make my own! I bought two seasonal dish towels at the dollar store. I used one (side ways) for the skirt part of the apron and cut the second towel in half, using one half for the bodice part of the apron.. I sewed the other half to the front (skirt) of the apron (for easy wiping of the hands when cooking). Then sewed some grosgrain ribbon to each side of the apron for the ties. When I sewed the bodice to the skirt of the apron I realized that the top of the towel (top part of the bodice) had a folded edge creating a perfect casing to feed the grosgrain ribbon through for the ties that go around the neck. And there you have it!! An apron made with dish towels!! ^_^
It only took me about an hour from start to finish, It might not be perfect but I love it!!! Oooh, maybe I can make some for Christmas gifts!!
Subscribe to:
Posts (Atom)


