I was feeling creative recently and this was the result! 16" x 20"
I made several but I liked this one the most. I gave it to a good friend of mine for her birthday. She loved it. :)
Mixed media, I made the fairy from wire and fibers and a wooden ball for the head. I used specialty yarn for the hair. I LOVE FAIRIES!!
Thursday, August 9, 2018
ANNOUNCING....my latest published book
Hi everyone! ANNOUNCING my new published book.....
ALANNA AND THE FOREST FAIRIES
I'm so excited to share the news!!! It is online at Amazon and Barnes and Noble!!!
Synopsis....
ALANNA AND THE FOREST FAIRIES
I'm so excited to share the news!!! It is online at Amazon and Barnes and Noble!!!
Synopsis....
Alanna is a sweet and curious 8-year-old girl. She lives with her family in a quaint cottage
at the edge of the Giant Tree Forest.
Alanna has heard about and is fascinated by fairies and has always hoped
to see one. She frequently visits with a
widow neighbor that lives on a small farm just over a knoll not far from her
home. The widow seems to know a lot
about fairies. Alanna has a kind heart and because of this the fairies favor
her and reveal themselves to her. One of
her delightful encounters with the fairies happens at a festival in a nearby
village that is held in honor of the elusive fairies.
Labels:
Children's books,
Children's stories,
Fairies,
Fairy Tales
Thursday, April 5, 2018
ARTSY WINE BOTTLE ART on canvas
 |
| ARTSY WINE BOTTLE ART 16" x 20" Canvas |
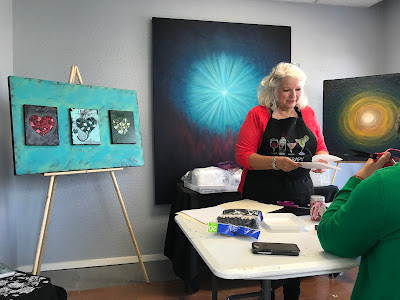
Hi! I am instructing an artsy class at an awesome Art Gallery downtown in a couple of weeks. Its a Make it and Take it workshop. We will be working on 16" x 20" canvases.
First step is to paint the background, (I used different hues of browns in this one). Then while the paint is still wet, the second step is to take sheets of plastic wrap and place it over all the wet paint, wrinkle it up a bit then pull it off. This technique leaves a really cool effect on the paint. I used a plastic stencil to make subtle effects on the paint as well. Then while the paint on the canvas is drying, use Mod Podge to glue cut up pieces of printed cardstock (of your choice) onto a large cardstock wine bottle shaped cutout. After all the pieces have been glued down, use a black sharpie permanent marker to outline each piece and the spaces in between to make it look like grout. Once the wine bottle cutout is complete, use Mod Podge to glue it down to the canvas, making sure it is completely adhered to the canvas.Once everything is dry, brush Mod Podge all over the canvas to seal it all down.
Then Voilà! it's finished!
Thursday, March 22, 2018
Very cost effective, as opposed to buying an expensive ready made wreath!!
I used a grapevine wreath, 2 bunches orange Tiger Lilies, small yellow filler flowers, a hot glue gun with glue sticks and a hard cardboard Easter wall plaque. I placed everything where I wanted them and then hot glued them all down. I can't hardly wait to start on my Summer Time Wreath!!
Monday, March 5, 2018
DIAPER CAKE FOR BABY SHOWER
Hi! So glad you stopped by my Blog!
Here is a Diaper Cake that I made for a friend of mine a little while back. I hadn't realized that I hadn't added it to my blog, so here it is. I used newborn diapers and formed them into 3 different sized rounds, holding them in place with large rubber bands. Then I placed them one on top of the other, forming a 3 tier cake. I inserted a dowel rod down the middle through each tier all the way down (from the top down) to make sure they don't slide off each other. I then wrapped large burlap ribbon around each tier, same with matching twine, added some burlap ribbon bows I made. I stamped a cute owl on brown card stock, glued a burlap circle behind it then glued that to a larger round card stock and glued to the front top tier. Since it was going to be a girl, I used pink crinkle on top of each tier. The young couple loved it!!
Here is a Diaper Cake that I made for a friend of mine a little while back. I hadn't realized that I hadn't added it to my blog, so here it is. I used newborn diapers and formed them into 3 different sized rounds, holding them in place with large rubber bands. Then I placed them one on top of the other, forming a 3 tier cake. I inserted a dowel rod down the middle through each tier all the way down (from the top down) to make sure they don't slide off each other. I then wrapped large burlap ribbon around each tier, same with matching twine, added some burlap ribbon bows I made. I stamped a cute owl on brown card stock, glued a burlap circle behind it then glued that to a larger round card stock and glued to the front top tier. Since it was going to be a girl, I used pink crinkle on top of each tier. The young couple loved it!!
Saturday, March 3, 2018
WALL DECOR
Hi guys! Here is a little grouping of items that I put together on my bathroom wall.
I bought the bicycle at Pier 1 Imports and the door and picture frame (with attached shelf) at Dollar General. The picture frame is for photos but I inserted an inspirational quote instead.
I think I will switch out the wreath on the door with seasonal themes.
I am so happy with how it all turned out. Total cost $11.00

Wednesday, January 31, 2018
Teal and white Christmas wreath 2017
The wooden plaque is from Dollar Tree .
Subscribe to:
Comments (Atom)


