Wednesday, October 25, 2017

SOCK SNOWMAN

I have seen sock snowmen on crafting sites and just love them.  So, I decided I would try my hand at it!  I went on Youtube and watched 5 or 6 tutorials on "How-to" create these awesome snowmen.
I got lots of information and tips.  These are the supplies I went out and bought.....

White socks, men's large
Christmas Women's socks* for cap and scarf
Raw White rice for filling
Embroidery floss 1 skiem
Assorted Christmas embellishments, small, such as snowflakes, buttons etc.
Pink blush and small brush for applying blush, to give him or her rosy pink cheeks
Small black beads for eyes
Small Jingle bells
Red pompoms or any color you choose
Hot glue gun and glue sticks
(You can also use Fleece, Felt or Flannel to make the cap and scarf)*


Lay the sock flat and cut across just below heel.


You will be using the top part of the cut sock.


Turn it inside out.  Gather it at the top and take a length of floss and tie it up tight.  Make sure to tie it up really secure.


Turn it back right side out with the gathered end inside the sock.


Fill up the sock with rice.  Push down on the rice and make sure it is firm and full.
(The snowman behind the rice jar is being snoopy, he wants to see what's going on)


Take a length of floss, gather the top and tie it securely.  Trim floss.


Using your hands, form an indention for the neck area then use the floss to tie it while forming the neck. Tie it securely.  Trim floss.  The snowman form should be nice and firm.  Do not make the neck too thin because it will flop over.  Nobody wants a floppy headed snowman!  Lol!


Use a Christmasy sock to make the knit cap, cut off a long enough piece of sock lengthwise for the scarf, tie it around the neck.  Cut off part of the sock for the cap,( it will look like a tube) gather up one end making that the top of the cap and tie it with the floss,  and fold up the other end to make the band of the cap.   Glue a pompom onto the gathered top and add jingle bells .... or not.  It's your choice. Once you have the cap positioned the way you want it on the head, glue the cap to secure it.

*You can also use Fleece, Felt or Flannel for the cap and scarf, but you might have to sew a little.  I don't like to sew, I can't even sew a straight line nor do I want to!  Ha!!

So, there you have it.  Pretty easy right?  And lots of fun!!  Use black beads for the eyes, you may also add a nose and a mouth if you'd like to.

Now you can make more snowmen and decorate them with bells, buttons or bows to your hearts content!

Thank you for your interest!  Have a blessed Christmas Season!

Sylvia


Tuesday, October 24, 2017

CHRISTMAS LOLLIPOPS

This is a great idea for Christmas Secret Santa gift or give away when you have guests come visit during the Christmas Season.  It makes a perfect Christmas gift from your child to their teacher too!
All you need is.....
  Large Lollipop  4" x 4"  (I find these at Dollar Tree)
  Snowman face   (you can draw it or get free clip art from the internet)
  White copy paper
  Adhesive to attach snowman paper face to lollipop
  Fleece, Flannel or Felt for cap and scarf
  Jingle bells
  Christmas ribbon
  Christmas embellishments
  Embroidery floss  small amount (color to match cap/scarf)
  Hot glue/glue gun

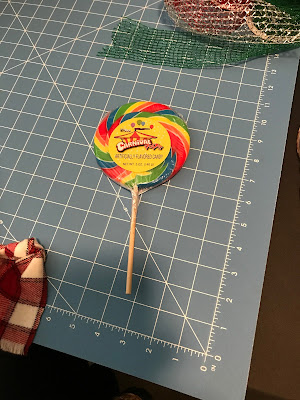
The large lollipops are a dollar each at the Dollar Tree. Do not remove the plastic wrapper from the lollipop.  Do not remove the front or back label, as the front one will be totally covered with the snowman face.  The ingredient label on the back, should remain intact.
Search the internet for Free Snowman candy wrapper templates, save to your computer, size them and print them. Or you can just paint the face yourself. Cut it out and make sure its just a little bit smaller than the lollipop.  Use double sided adhesive tape or run it through a sticker maker, then adhere to the front side of the lollipop, leaving the ingredient list intact on the backside. 

Hat......
I used a piece of plaid flannel cut to 10 inches lengthwise by 7 inches wide. Please refer to the photo to see placement.   Fold about 1 inch up twice lengthwise to create the cap band. Positioned it on the lollipop, just over the eyes, flip it over, overlap the sides on the back and glue it together. Tack the cap onto the lollipop every inch or so with the hot glue to keep it from sliding off.  Gather the top of the cap, use the embroidery floss to tie it up, leaving an inch or so of the fabric at the top, fluff it up, tie some ribbon and 2 jingle bells to it. 

Scarf....
Cut a strip of 1 and 1/2 inches wide by 10 inches long of the fabric for the scarf, tie it around the stick just below the lollipop, position like a winter scarf and hot glue it.
Add snowflakes or embellishments of your choice to add your finishing touches.

And there you have it!!! 
If you look a little further down in my blog, you will see some I made with a  Halloween theme last year.  They are pretty cool too!

Hope you have as much fun as I did making these!  Make them for your friends and family.  They will love them!


Monday, October 23, 2017

THANKSGIVING WREATH 2017


Hi guys!  I want to share a photo of a  wreath I made for this year's Thanksgiving but I gave it away as a gift.  It was the first Deco Mesh wreath I had ever made.  I watched some tutorials on the subject, which were very helpful.  I love YouTube!!!
TIP....I found it very helpful to use my artist easel to hang it on while I worked on the wreath.